How To Guides
How to Create a Google Tag Manager Account

Creating a Google Tag Manager account allows you to manage marketing tags and tracking pixels on your website without needing to modify the site's code each time a new tag is added. Below are the steps to create a GTM account and set up a Tag Manager container.
How to Create an Account and Container
Step 1: Begin by logging into your Google account at tagmanager.google.com.
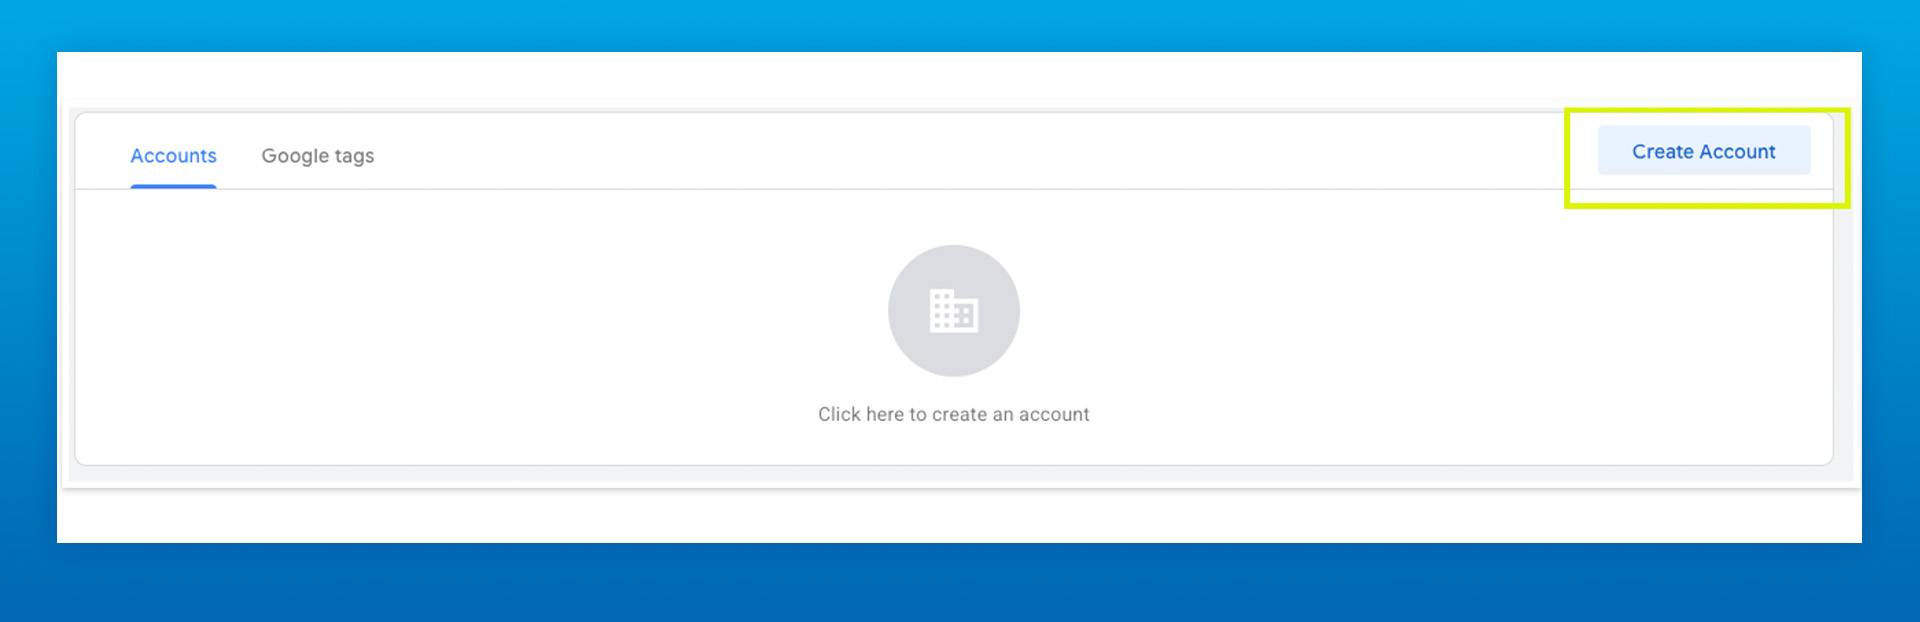
Once you're logged in, select Create Account.
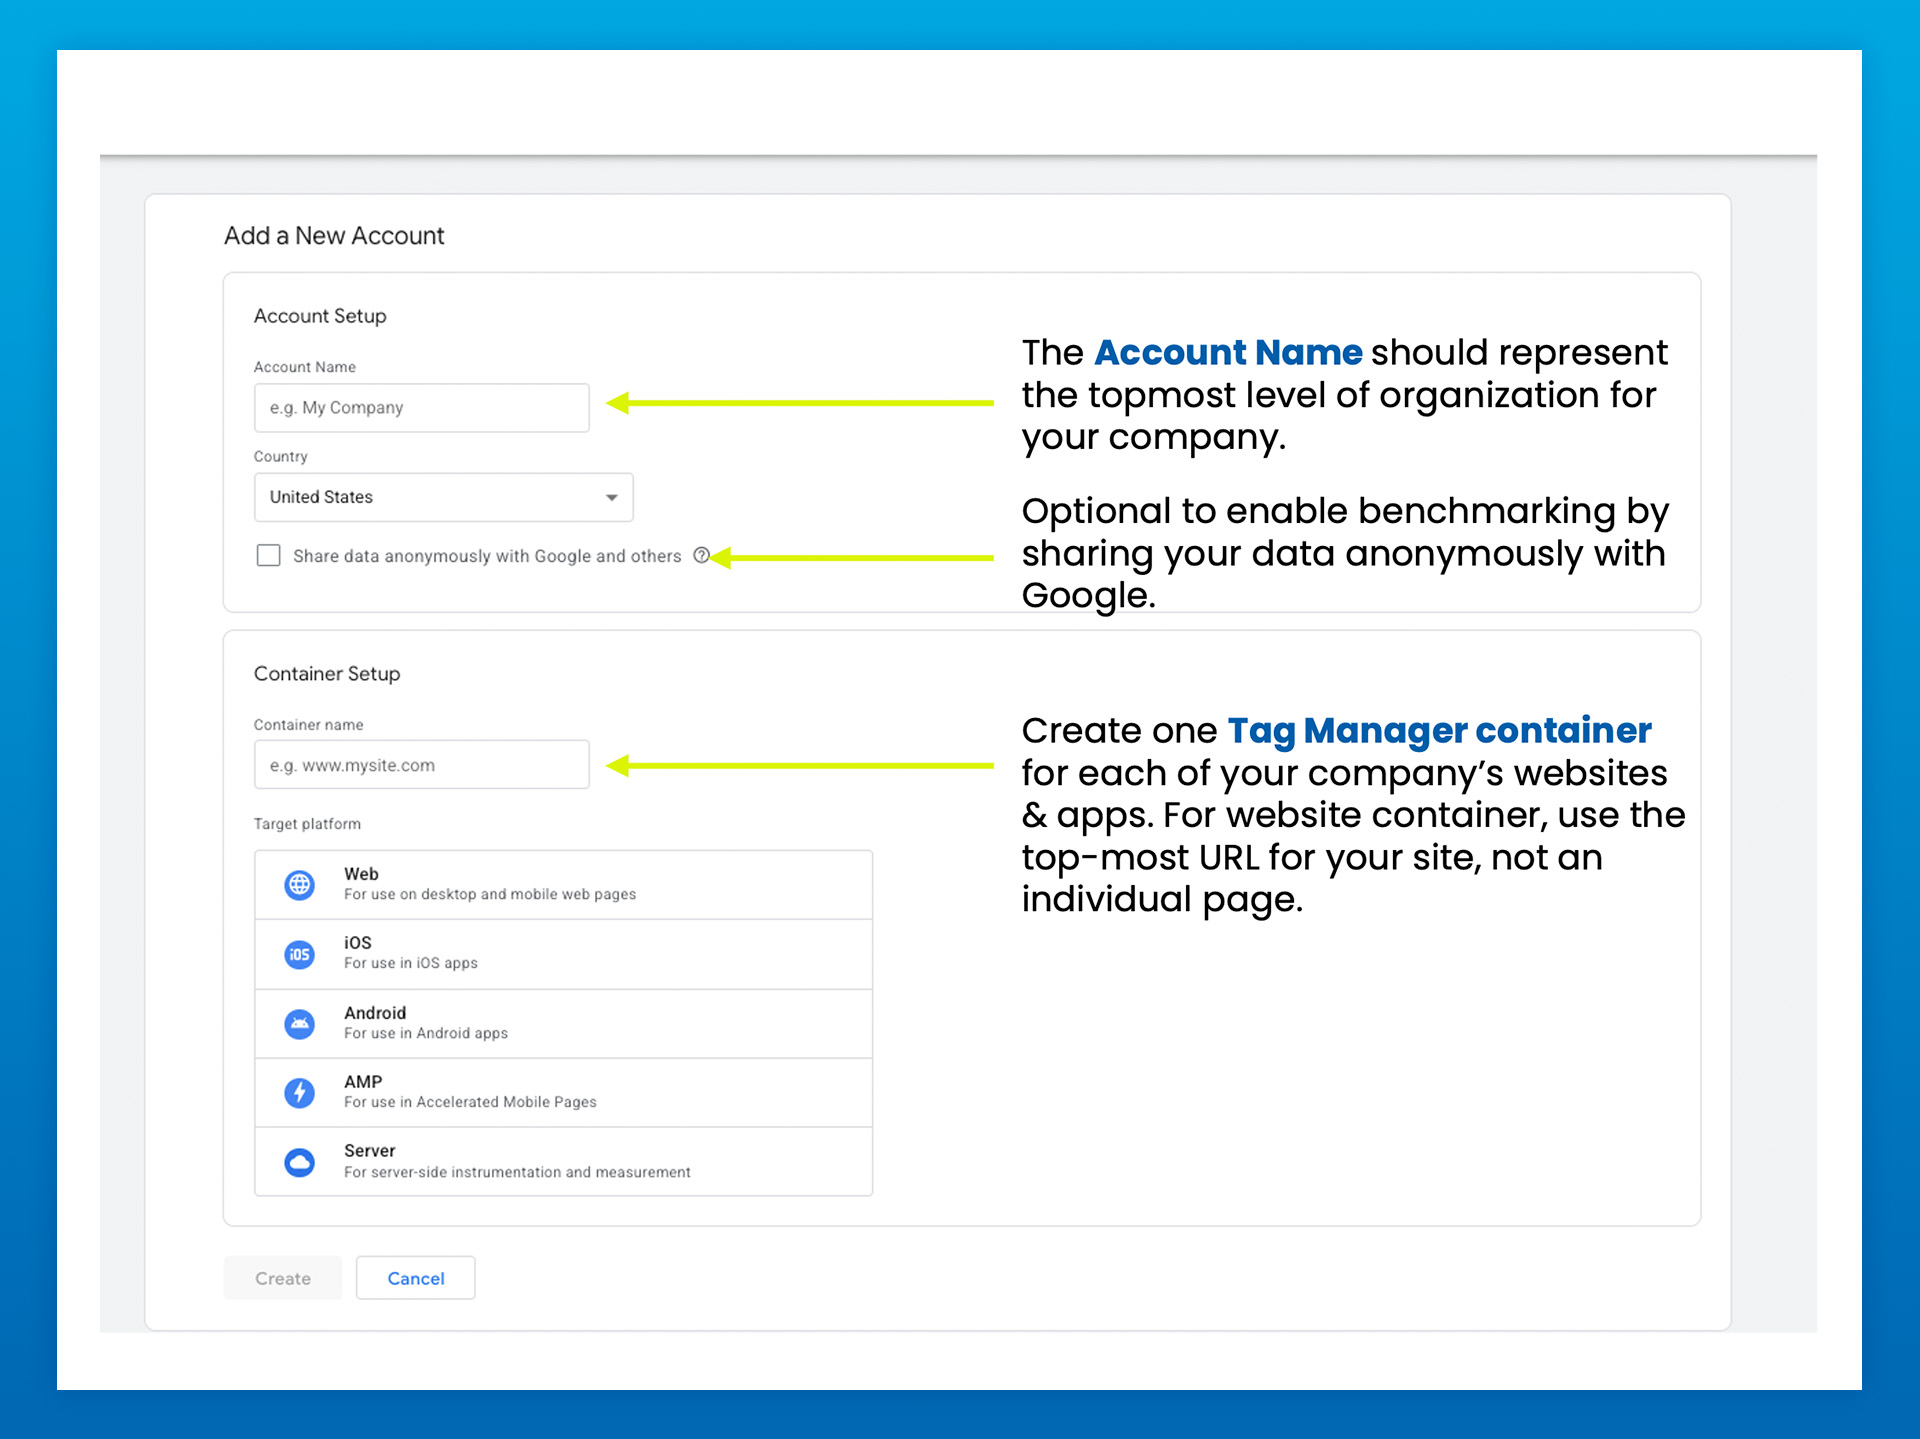
Step 2: Fill out the New Account information and follow the steps in the image below.
Once complete, click Create and agree to the Terms of Service.
If your company has more than one website or app, create another container by returning to the Accounts tab and clicking Create Container.
How to Install a Web Container
Once you create your Tag Manager Container, install it to your website by adding the necessary code snippets. You will need to have access to your website's code.
Step 1: In Tag Manager, under your account, open the Tag Manager Container you want to edit.
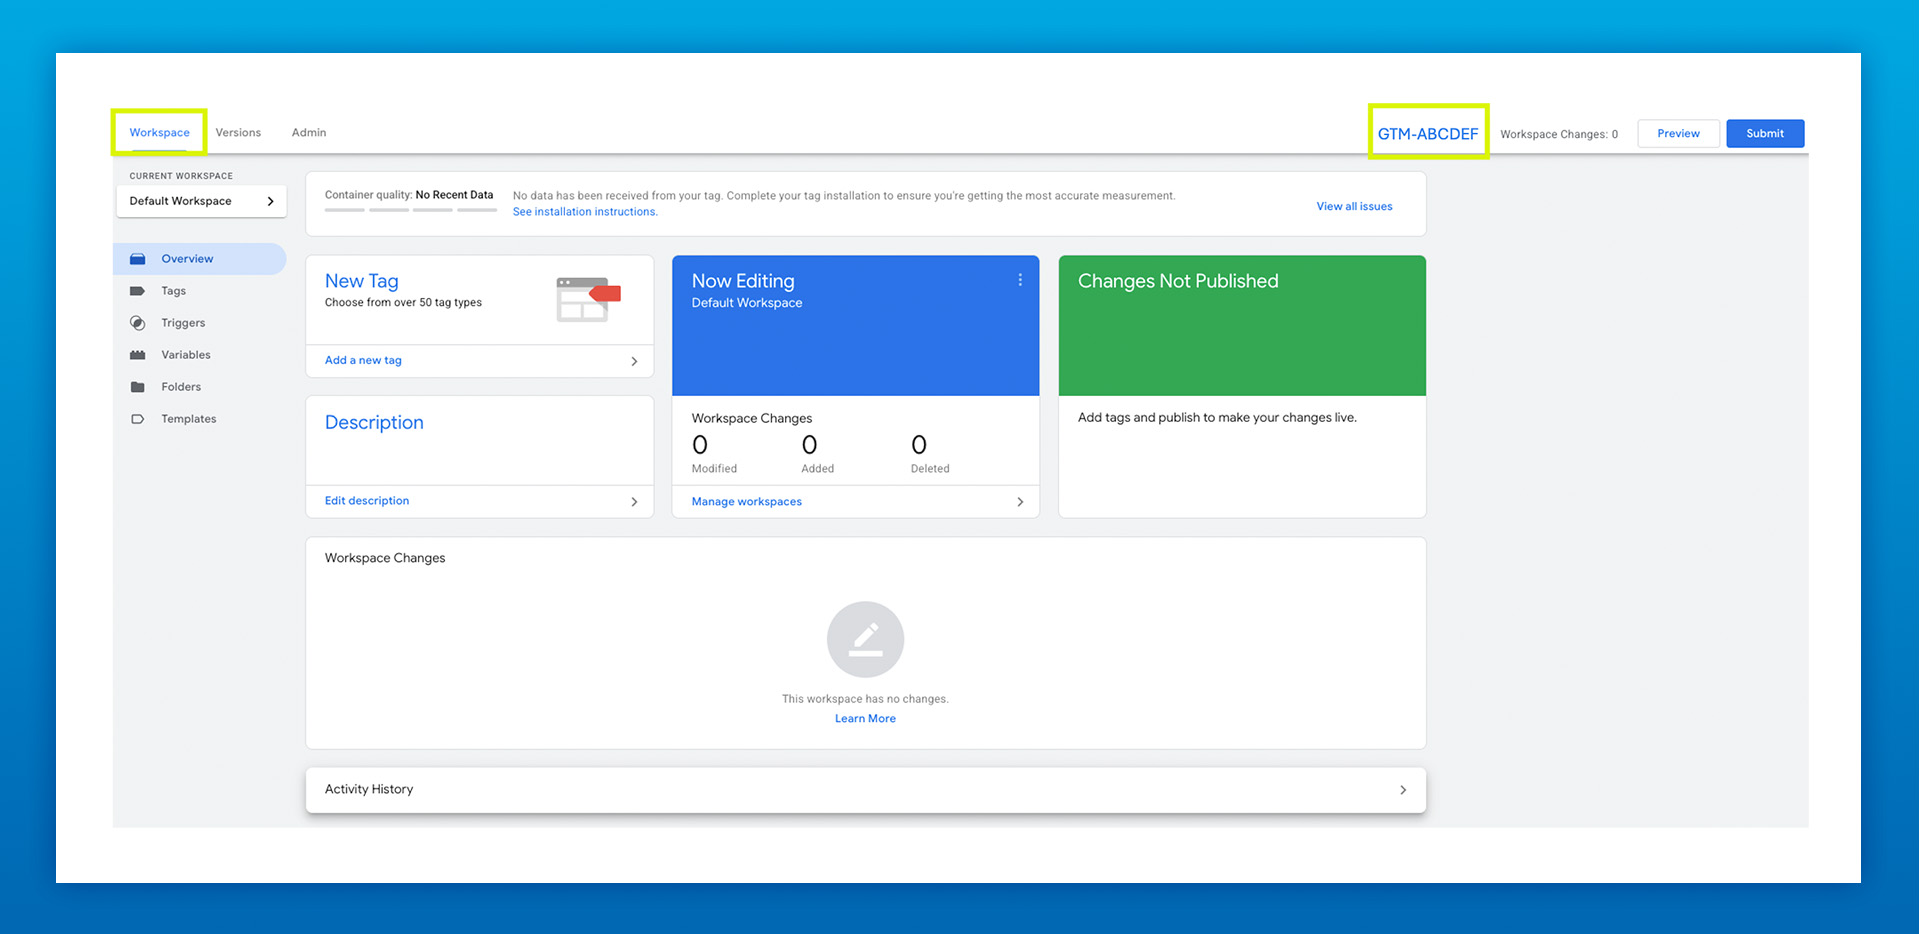
Step 2: In the Workspace tab, select your Container ID starting with GTM.
This example shows the Container ID as GTM-ABCDEF.
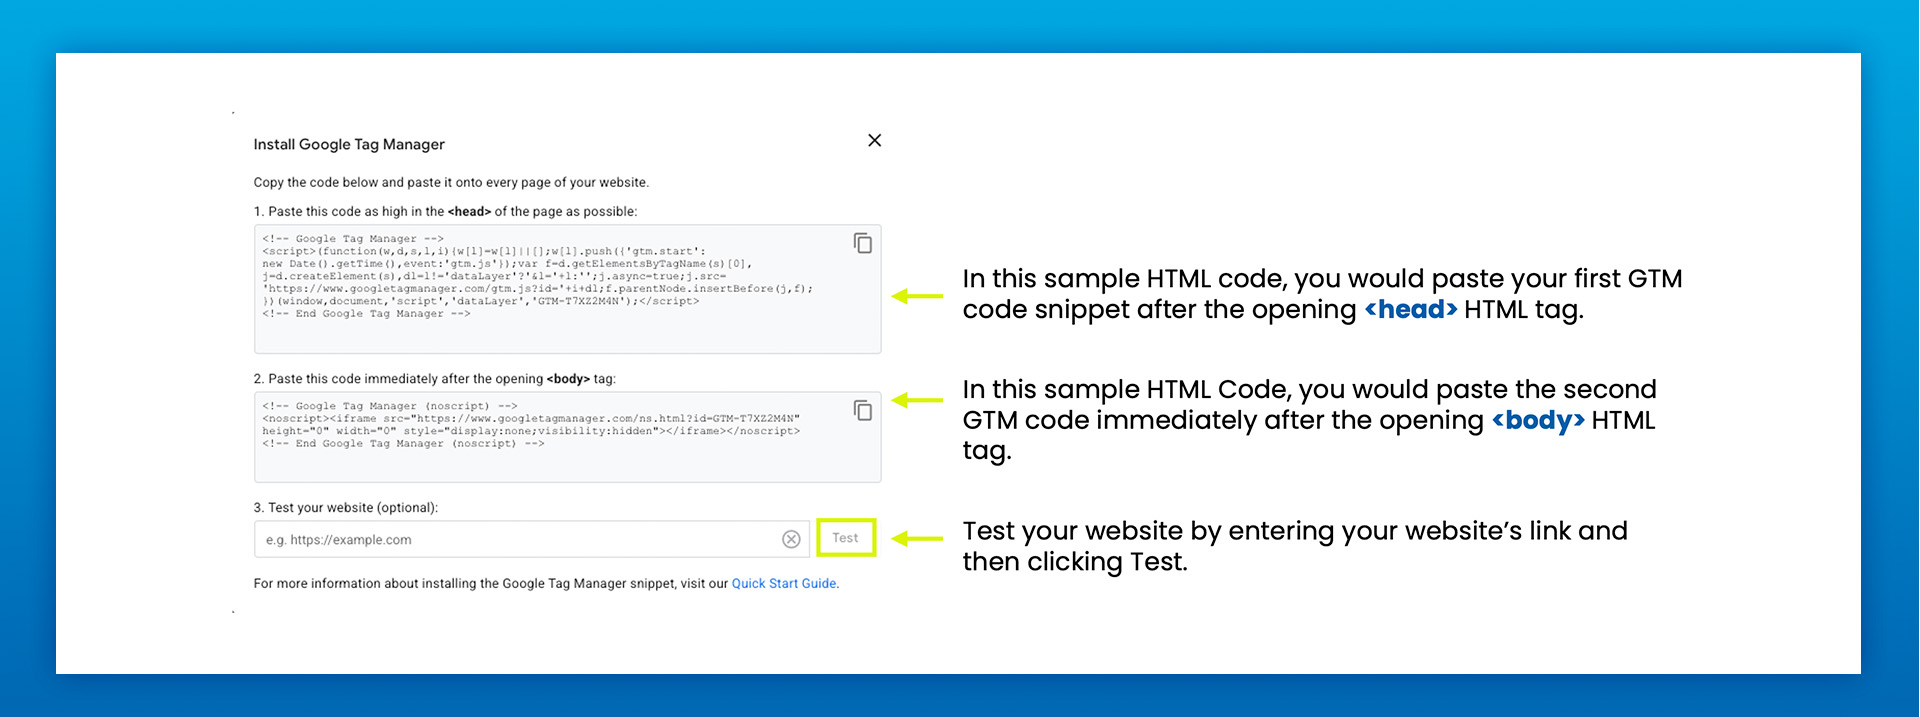
Step 3. Install Google Tag Manager with your custom HTML code.
The "Install Google Tag Manager" window will open. You can also open this window at anytime by clicking on your GTM container ID located at the top right of your screen.
Follow the steps pictured below to copy and paste your GTM code.
If you used a website builder or content management system (CMS) like Wordpress, click here to see how to set up the tags.
Step 4: Click OK.
After you add the code to your website, you can use Google Tag Manager to set up and manage tags without needing to update your code any further.
When placing a pixel for a GDM campaign, GDM will provide tag placement instructions along with the pixel code so we can measure and optimize accordingly.