How To Guides
How to Place a Universal Pixel in Google Tag Manager

Adding a universal pixel through Google Tag Manager is one of the most efficient ways to deploy tracking across your website. Instead of placing code directly on every page, Google Tag Manager lets you manage the pixel in one workspace and trigger it across your site from a single tag.
Follow the steps below to create, preview, and publish a universal pixel tag in Google Tag Manager.
Before You Begin
Make sure you have access to your Google Tag Manager workspace and the full universal pixel code you need to install. You will paste the entire pixel code into a Custom HTML tag. Your GDM team will provide the pixel code for your campaign.
Step 1: Sign In to Google Tag Manager
Start by signing in to your Google Tag Manager workspace. Once you are in the correct container, you will create a new tag for the universal pixel.
Step 2: Create a New Tag
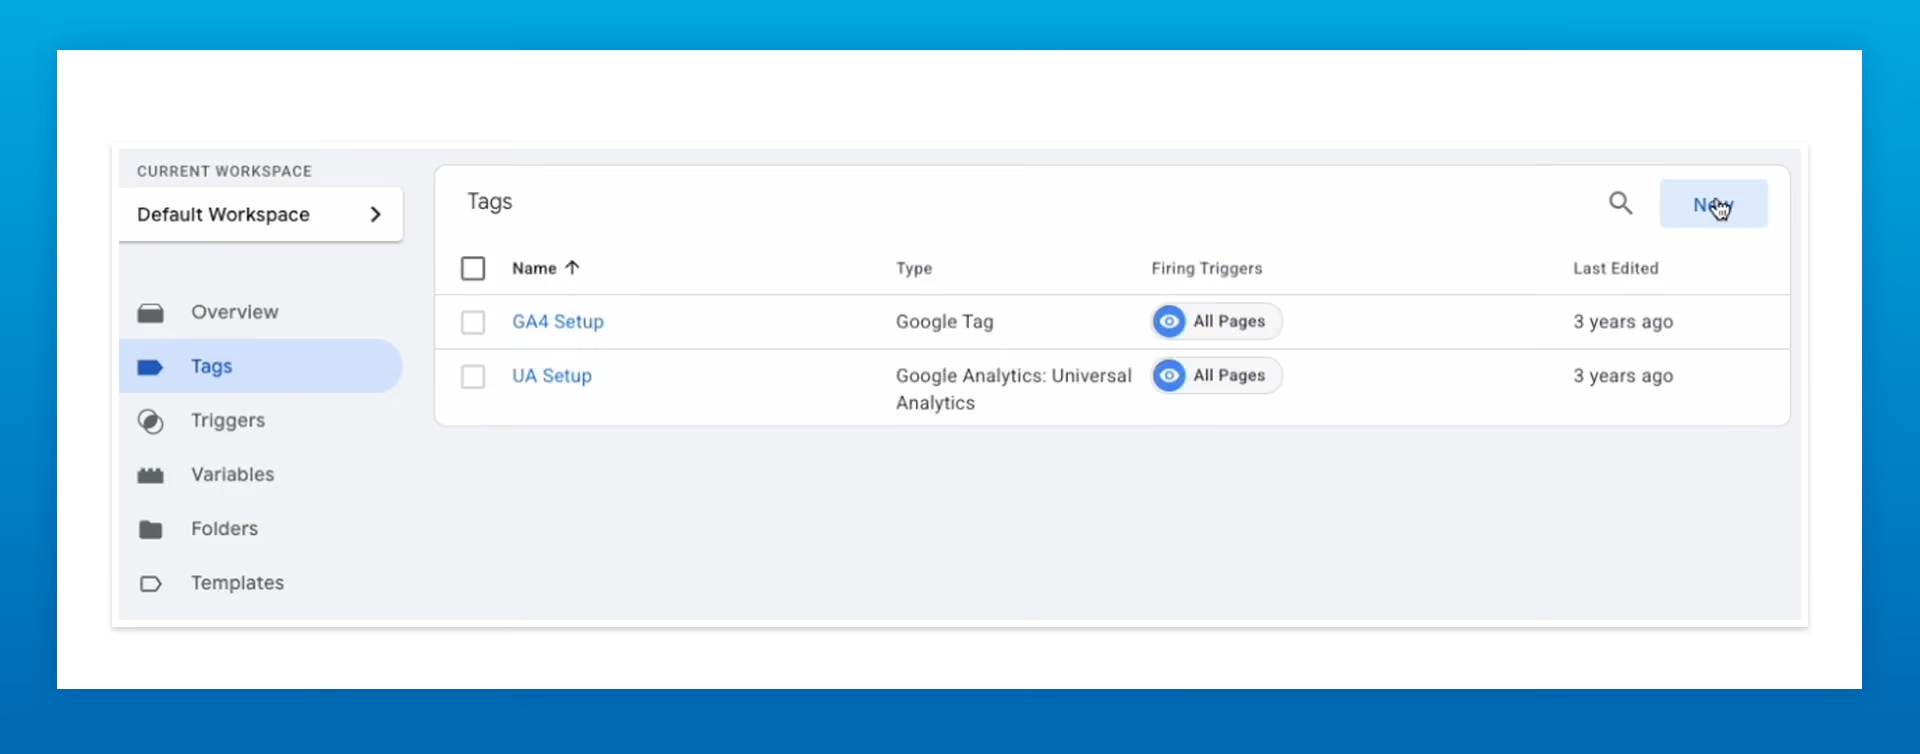
On the left-hand side of your workspace, click Tags.
Then click New to begin setting up a new tag.
This new tag will house the universal pixel code and control when the pixel fires on your website.
Step 3: Choose the Tag Type
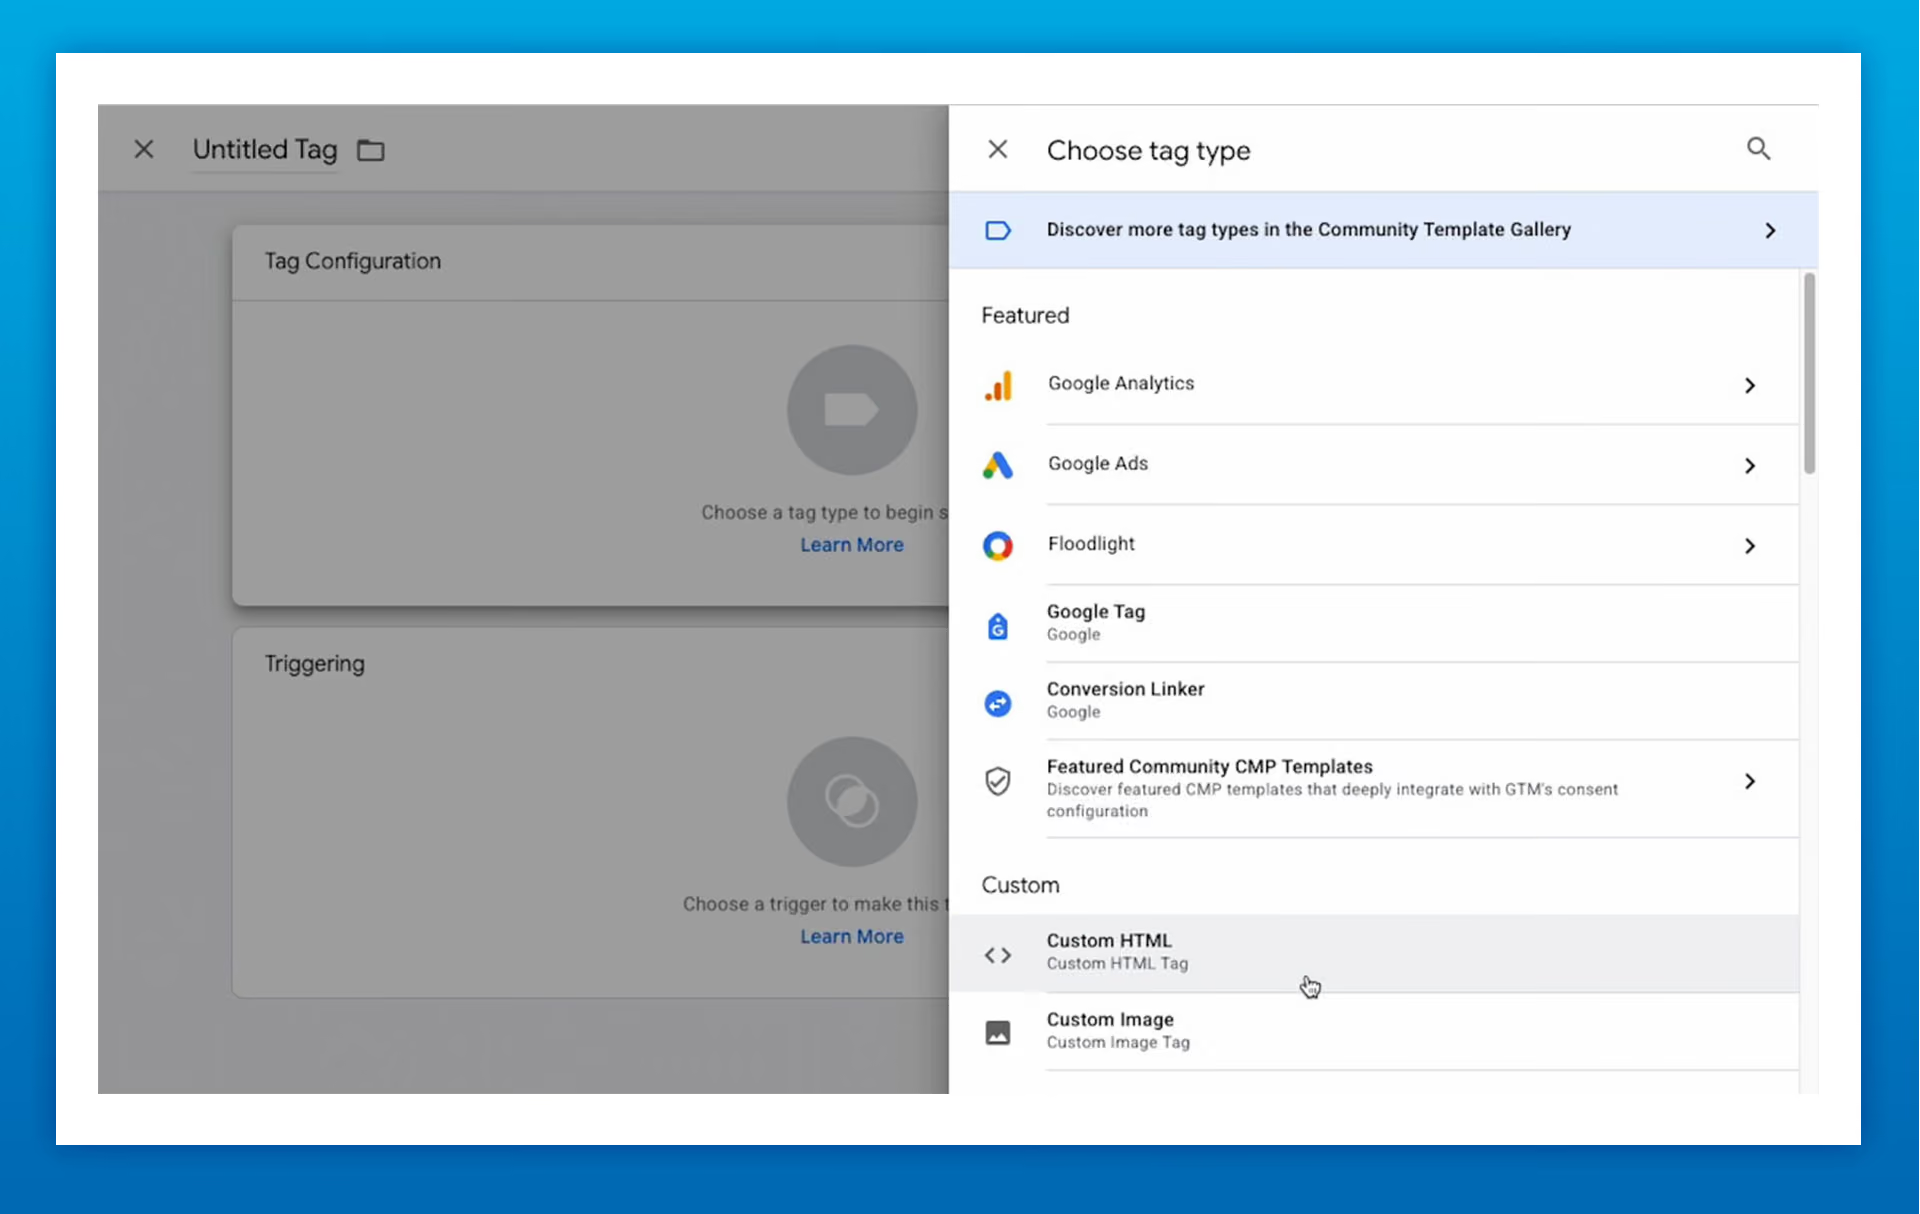
Click anywhere inside the Tag Configuration section. This opens the list of available tag types.
Under the Custom section, choose Custom HTML.
This option allows you to paste the universal pixel code directly into Google Tag Manager.
Step 4: Paste the Universal Pixel Code
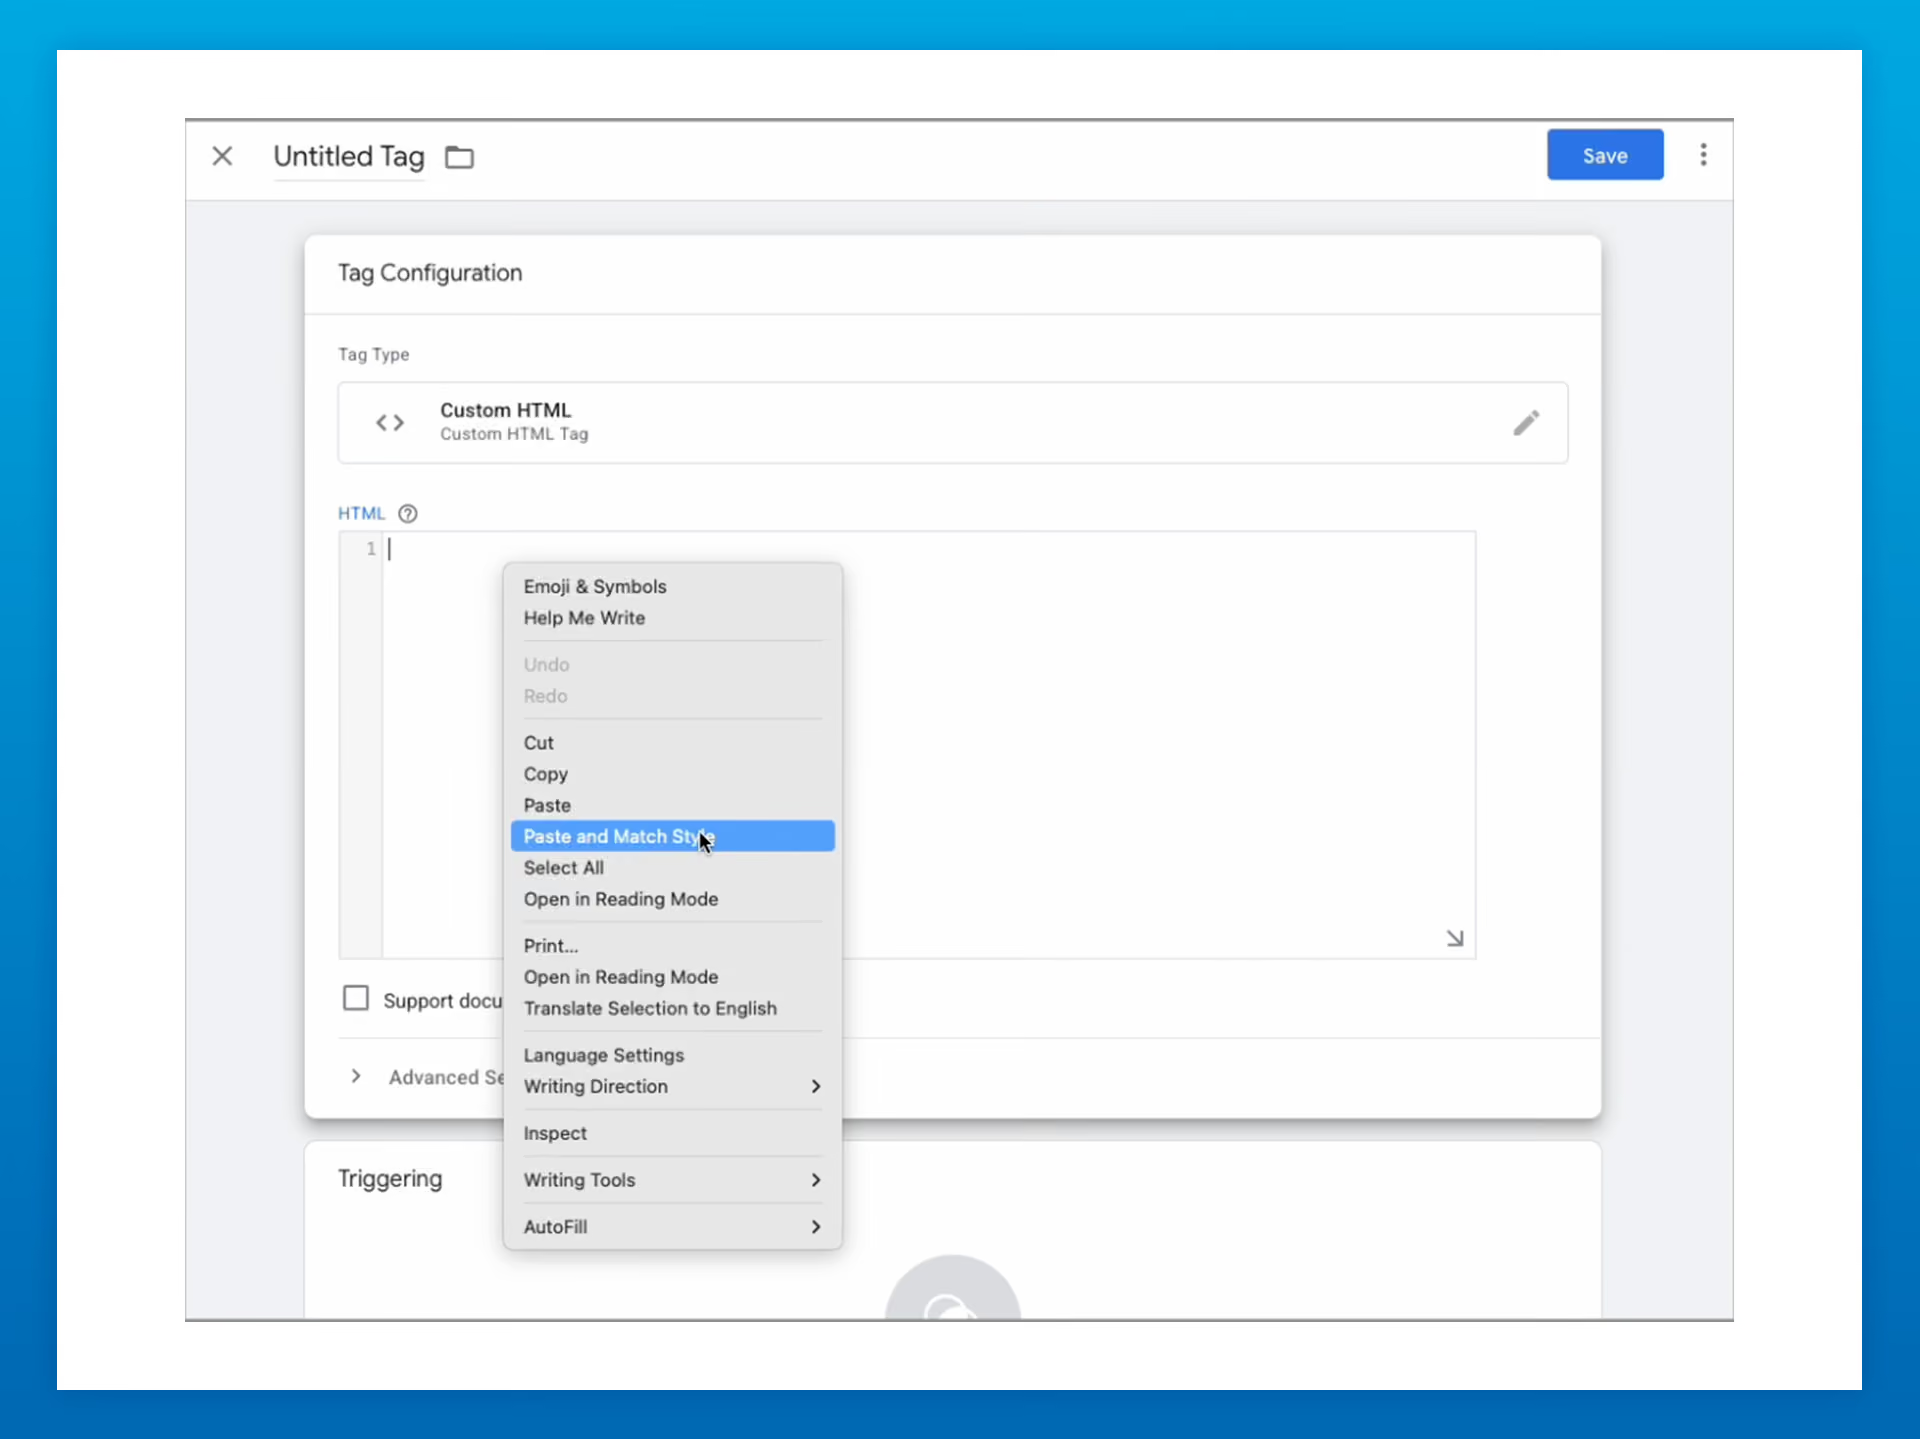
Copy the entire universal pixel code provided to you.
Then, place the code in the HTML box by right-clicking inside the field and selecting Paste and Match Style. This keeps the formatting clean and reduces the chance of adding unwanted styling or hidden formatting from another source.
Step 5: Set the Trigger
After the pixel code is added, click inside the box labeled Triggering to define when the tag should fire.
Choose All Pages.
Triggering the universal pixel on all page loads across a site is the most common configuration. This allows the pixel to load consistently as visitors move through different pages on the website.
Step 6: Save and Name the Tag
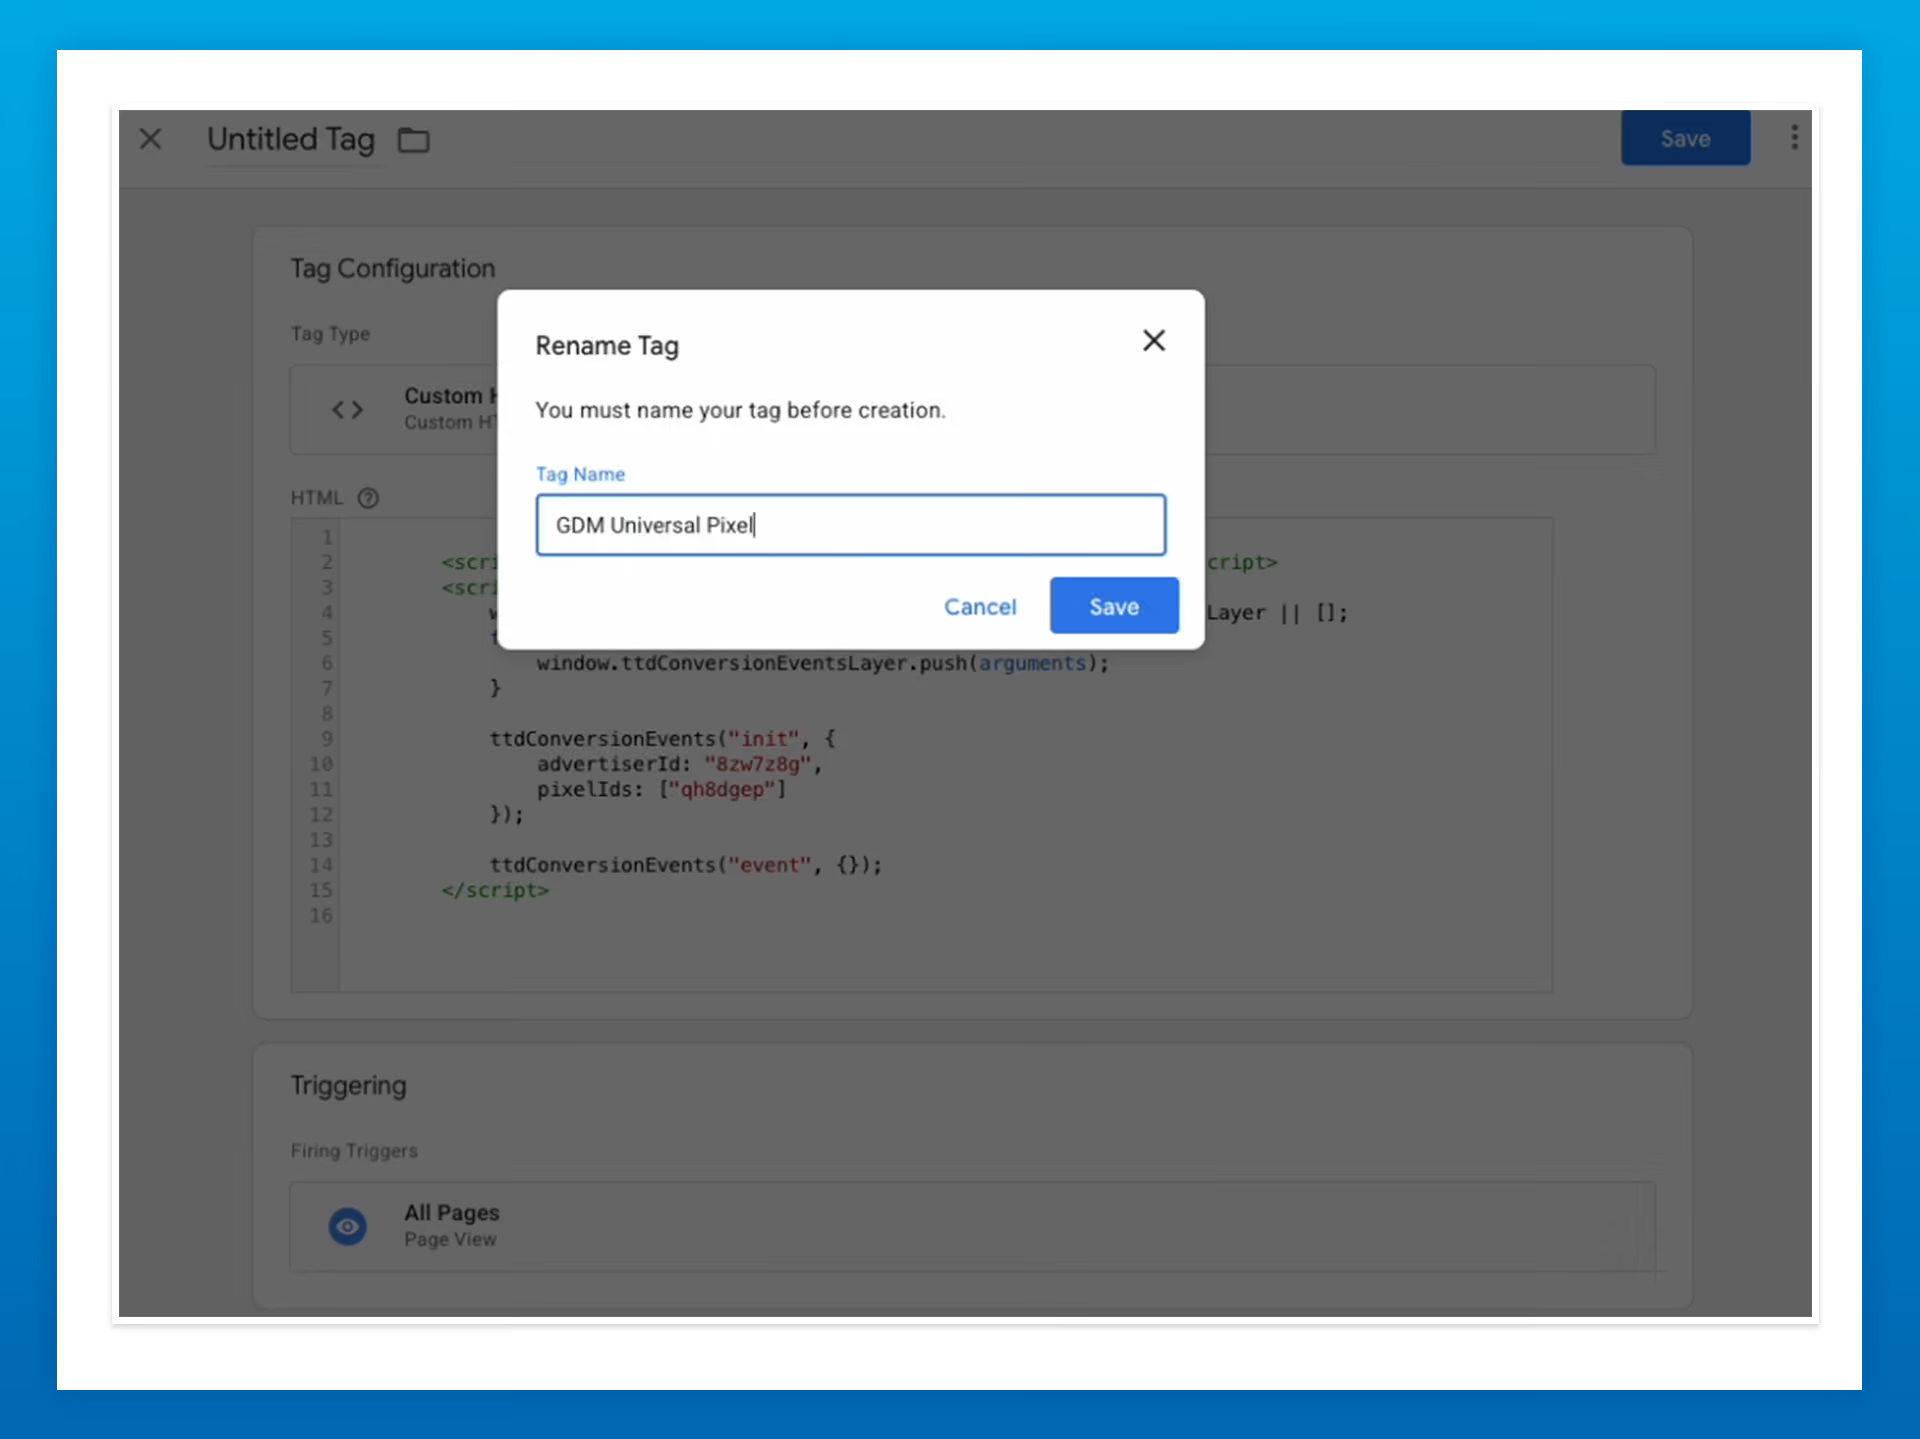
Click Save and give the tag an identifiable name. A clear name makes it easier to manage and troubleshoot later.
For example, you can name the tag: GDM Universal Pixel
Use a naming convention that your team will recognize, especially if your workspace contains multiple tags, triggers, or pixels.
Step 7: Preview the Setup
Before publishing, click Preview to review the tag setup.
Preview mode allows you to confirm that the tag is firing correctly and gives you a chance to catch any setup issues before the pixel goes live. Review the configuration carefully and make changes if needed.
Step 8: Submit the Changes
Once the tag is configured and reviewed, click Submit.
When prompted to identify the change, use a clear description such as: Added GDM Pixel
This creates a clear record of what was changed inside the Google Tag Manager container.
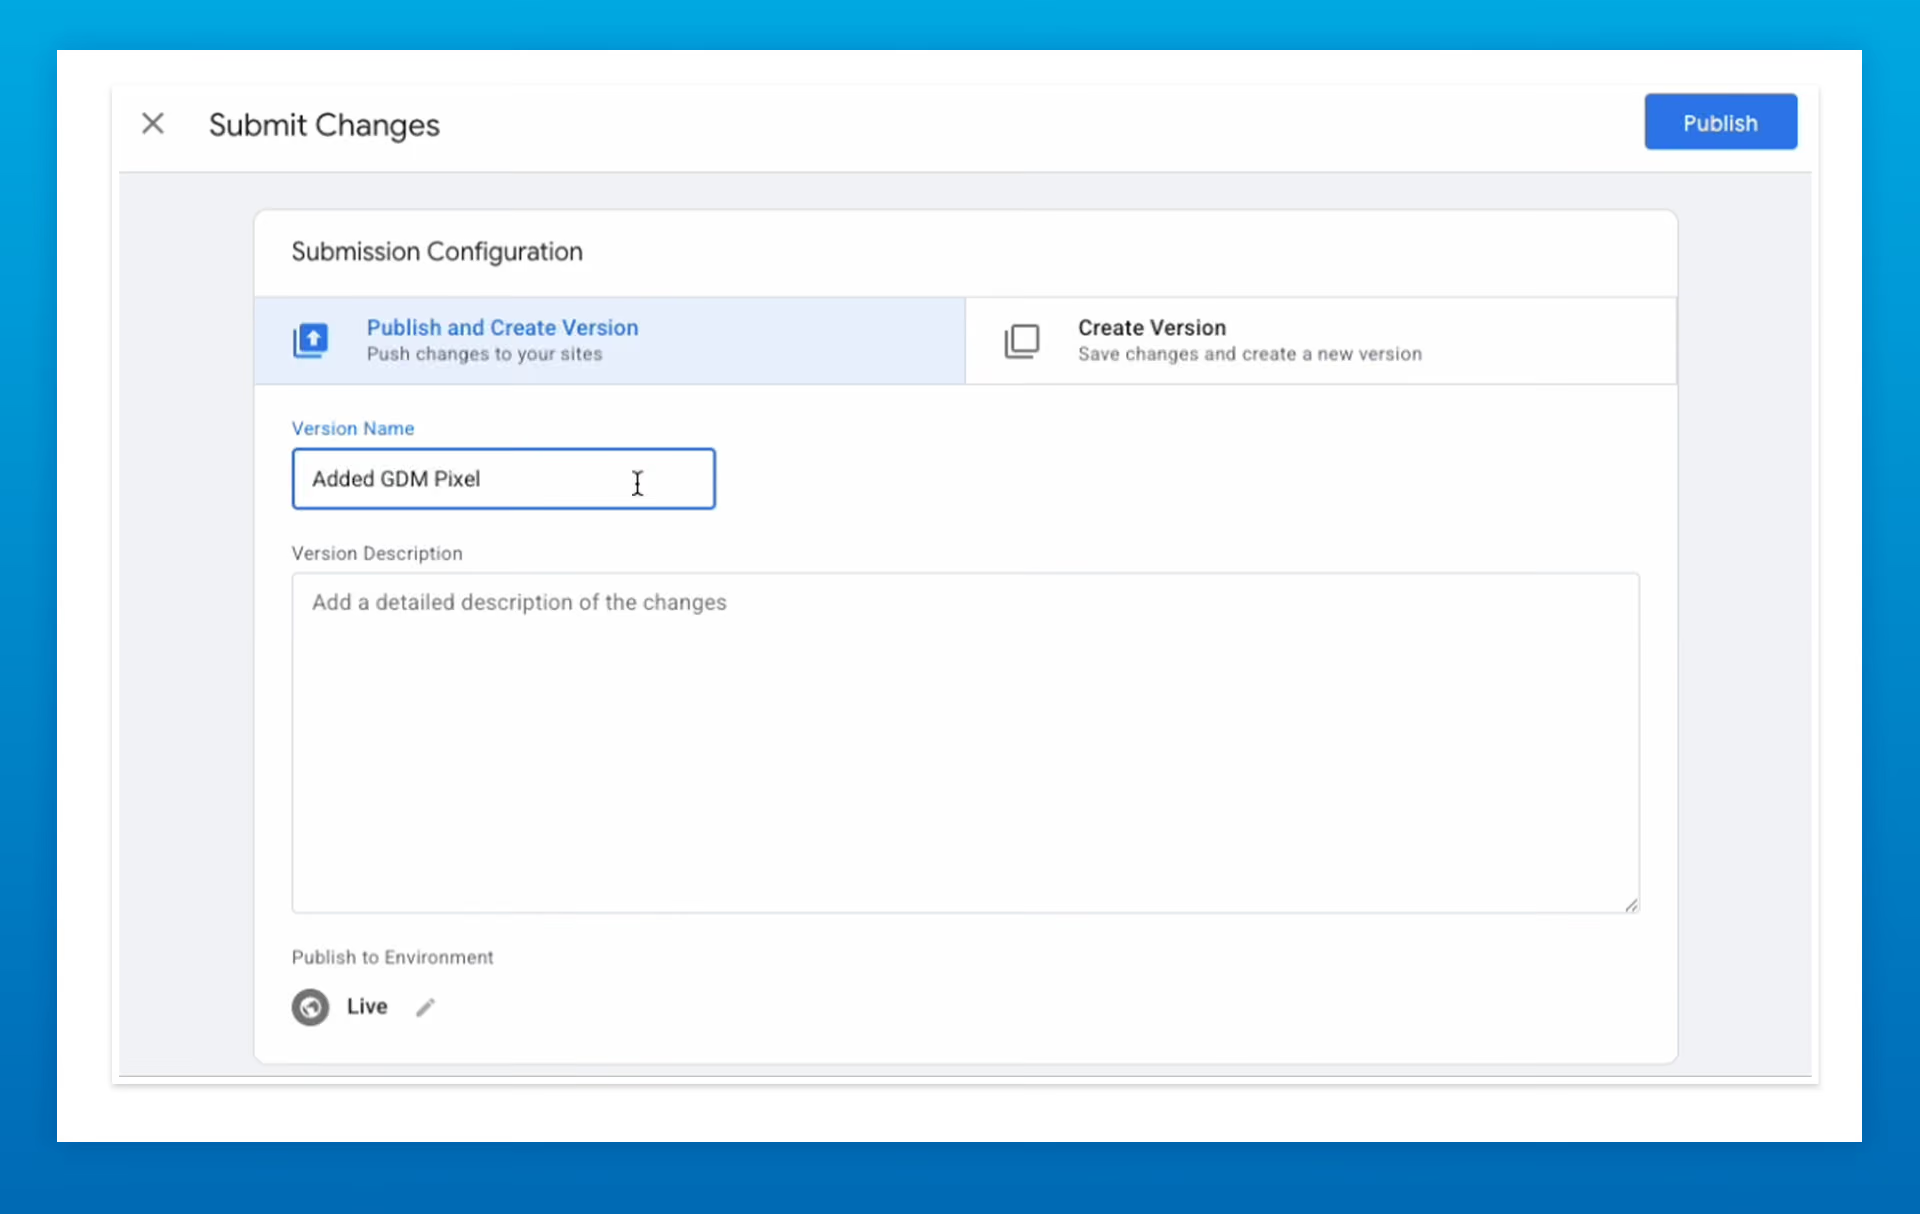
Step 9: Publish the Tag
After submitting the change, click Publish to complete the setup.
Once published, the universal pixel will be active based on the trigger you selected. If you chose All Pages, the pixel will fire on all page loads across the site.
Final Check
After publishing, it is a good idea to verify that the pixel is working properly. Use Google Tag Manager Preview mode, your browser’s developer tools, or any platform-specific pixel verification tools available to confirm activity.
By placing the universal pixel through Google Tag Manager, your team can manage tracking more efficiently, keep implementation centralized, and maintain better visibility into future tag updates.